I’ve started brewing again since I had to dump the last few batches of beer and am in different stages of 3 new beers.
Cinnamon Porter: I brewed this three weeks ago and I just bottled it yesterday. Because my beers are bottle-conditioned, it will be at least another 3 weeks until it’s “ready.”
I purchased an ounce of cinnamon sticks to be used in this beer. .25 ounces was put in at the end of the boil. This was mostly because I was undecided when it was I should be adding the cinnamon. I was set on adding it to the fermenter but I thought I’d throw some in the boil to for good measure. The other .75 ounces was put in a cup of Crown Royal whisky with a little bit of vanilla extract added as well. This was left to soak for the entire first week that the beer was fermenting. Few reasons for this: One, anything you add to the fermenter must be sanitized. The typical way to add something like this would be to soak it in a little bit of boiling water for about 15 minutes, then cool it, and dump all of it, water included, into the fermenter. I wasn’t fond of adding water to the fermenter so I opted to soak it in whisky instead. The high alcohol content of whisky makes it sanitary and it tastes better than water. I waited a week to pour it in to ensure the cinnamon sticks really soak in the whisky. Also, the first week is when the yeast are actively converting the sugars and there’s a lot of activity going on in the beer. Adding hops, or anything else, during this time can result in the flavor being lost due to the fermentation process. After the first week, the actual fermentation is complete and the beer is conditioning or settling out some of the flavors, so it is ideal to add it then.
The color is very dark, almost black. However, swirling the beer around shows a reddish hue. The cinnamon gives the porter a nice smell as well as a different kind of bitterness than is usually present from the roasted malts or hops. The cinnamon isn’t too overpowering, but you definitely need to like cinnamon if you are going to drink it.
Honey Pale Ale: The very first beer I brewed was a pale ale that used only one malt and one variety of hop, centennial hops. I wrote that recipe as simple as possible just to get an idea of where to start when it comes to writing my recipes. Despite all my other beers since then containing various varieties of malts and hops, I liked the idea of making the same simple beer again, but attempting to improve the flavor. There are a lot of single malt and single hop beers (typically called SMaSH beers) that are very good. I think being able to make a really good beer with as few ingredients as possible is a sign of skill. So I changed the things I found boring in the first one.
First, I used a higher quality, Belgian pale malt this time around. The hops tasted great in the original, however it wasn’t quite bitter enough and there wasn’t as much aroma as I would like. So I adjusted the amounts and times that hops are added to accentuate the bitterness, but still keep it moderate to keep with the style. I am also adding twice as much hops in the fermenter (called, dry-hopping) to boost the aroma.
On top of those changes, I wanted an added sugar in there that would compliment the single malt without being too obvious. I added honey to this beer as well. Not enough that would change this beer in to a braggot (beer made up of 50% honey, 50% malt) but enough to make a light difference.
I brewed this last Sunday so it is currently fermenting away. I’ll dry hop it this upcoming Sunday and from there, it will be about 5 weeks until it is ready.
IPA: I was very impressed with the IPA I previously brewed. The feedback I got from the people who have tried it was that they were as well. However, I did find it lacking in a few areas. Much like my pale ale, I modified the recipe to try and improve the flavor.
Cascade hops were the only variety used in the original. It had a great bitterness, however it wasn’t as complex in flavor as I would have liked. This time around I purchased chinook hops to use as well. Drink a Stone Arrogant Bastard to get an idea of what these hops taste like. I add hops several times during the boil in this recipe. The chinook hops will be primarily added in the first half, where as the second half will use primarily cascade hops. Chinook hops have a higher alpha acid (bittering component in hops) so they are better suited in the beginning, where as cascade is better suited as an aroma hop to be added at the end of the boil.
The original IPA, just like the pale ale, was really lacking in the aroma department. So, once again I am adding twice as much in the fermenter. Not only that, I am going to be using citra hops. Citra hops are a newer variety of hops that are popularly used as a bittering hop, or to dry-hop beers with. They have a very citrusy flavor and smell so they are perfect for IPA’s.
Very few places sell citra hops, since they are less common and a bit more expensive. Most places I checked either didn’t carry them, or were sold out. I found a site that had both pellets and whole leaf hops. Briefly, these are the two common ways to buy hops. Whole leaf hops are hops plucked from the vine and packaged. Pellet hops are hops that are ground and compacted into little pellets. Pellets are typically more common since they take up less space and are easier to filter out when brewing. However whole leaf hops are ideal for dry hopping as they add a fresher aroma. If I’m going to buy citra hops to dry-hop the beer, I figure I should buy the whole leaf. This will be the first time I use whole leaf hops. I am very excited to see how this beer turns out! I am going to brew it Wednesday.
After these three beers, I need to take another short break from brewing as I will be moving. Rest assured, the next few beers are already planned out: First, I’ll be making what will basically be the brown ale version of the pale ale, however I will be using maple syrup. I also plan on buying a fresh pumpkin and brewing a smoked pumpkin porter! This will be quite an involved process to make. Due to the amount of ingredients I will be adding to this beer, it will be a small batch, but it will be worth it!
21st Amendment has not only great beer, but also awesome graphic design on all of their beers. This beer is no exception.
One, it has a badass name and two, it doesn’t look like a beer label. All of their beers are canned so imagine seeing this newspaper print wrapped around the entire can.
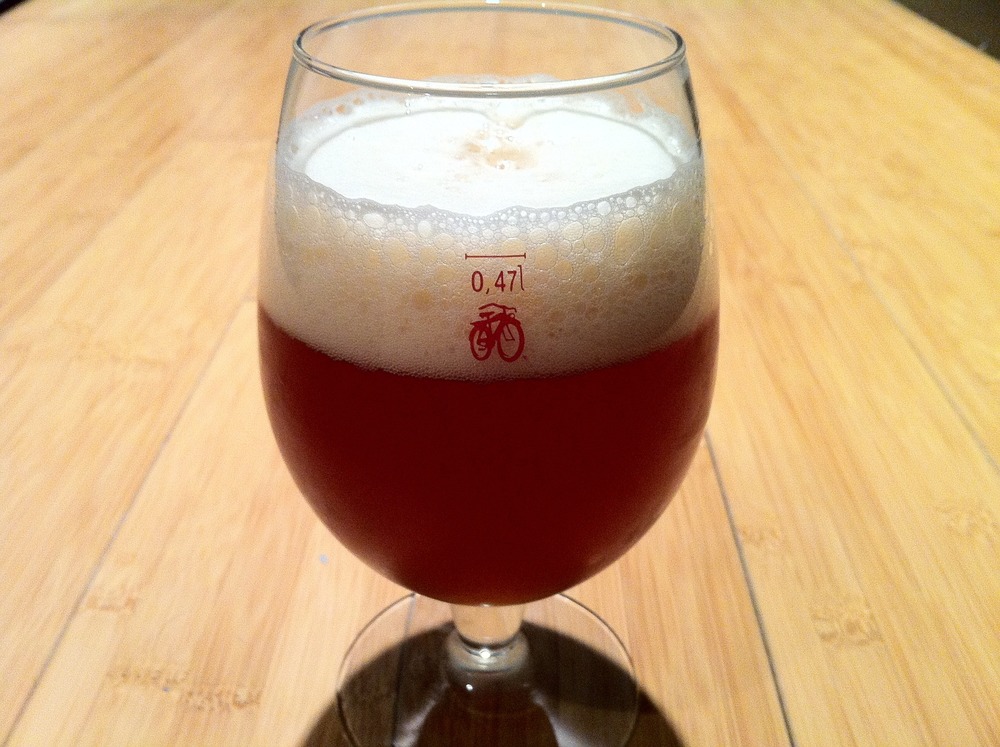
I finally had the chance to taste the bottled and carbonated IPA I brewed and I was pleasantly surprised! Of the three beers I’ve brewed thus far, this one is definitely my favorite.
It has a very reddish hue, I was expecting it to be more of a golden color. This shows how much of an effect the slightest specialty grain addition affects the color.
There isn’t as much hop aroma as I would like. Typically, I love IPAs with a strong hop smell. This, on the other hand, has more of a bready, malt smell. Not bad, just not what I’m looking for in an IPA.
It’s amazing how much the taste of a beer changes as it’s fermenting and conditioning. Immediately after brewing, it was a very sweet liquid, with some florally, hop taste. After it finished fermenting, it had a very smooth texture. Not too thin, and not too thick. The sweetness mostly disappeared, but what was left had masked most of the hop bitterness. It made for a very good beer, but not what I would recognize as an IPA. After I let it carbonate and ferment in the bottle, it had changed completely. The carbonation gave the beer a lighter texture. It still has a very smooth taste, but only in the beginning. The finish has a wall of bitter hops that come out of nowhere. Now it tastes like an IPA! While it doesn’t have the aroma I was looking for, it has a much better bitterness to it than I typically find in most IPAs.
Next time I brew this, I’ll likely leave the grain bill alone. The taste was smooth and had a great texture and reddish color made the beer stand out from typical pale colored beers. While I’ll likely mix up the types of hops I used, I want to keep the same bitterness levels. I loved the bitter finish this beer had. However, I’ll add quite a bit more at the end of the boil and dry hop the fermentor with more hops as well. Adding more hops during these times will produce more hop aroma.
I am really looking forward to people trying this beer, but I admit, the 8.5% alcohol and bitter finish might be a bit much for most people!
Here is a picture I took a few days ago of the pale ale I brewed. The cloudiness is from the yeast. All the beers I brew are bottle conditioned, meaning that they are fermenting and carbonating in the bottle. This is why, after waiting 3 weeks to bottle it, it needs to sit in the bottle for 2-3 more weeks. This leaves a layer of yeast at the bottom of the bottle.
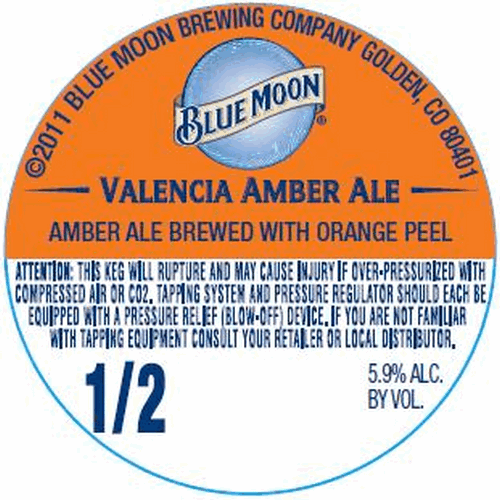
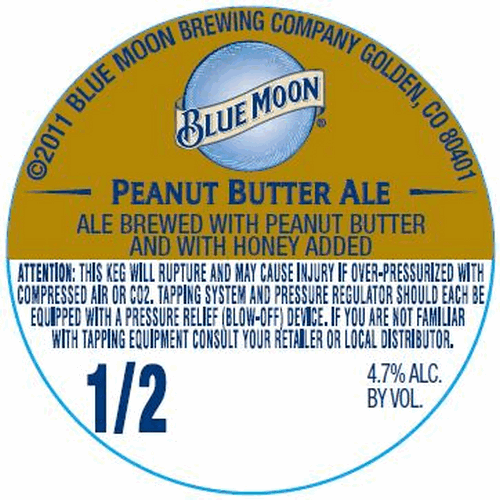
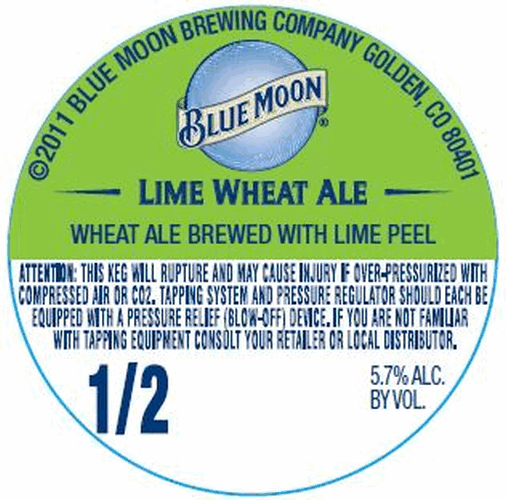
5 new keg labels from Blue Mooon. It’s interesting that these approvals are for kegs. I don’t think I’ve ever seen a Blue Moon seasonal on tap anywhere, but I could be wrong.
I’m not a fan of Blue Moon, but their seasonals are sometimes ok. Seeing this list though makes me wonder. It looks like they are throwing darts at a list of beer types in hopes at least one of them sticks. That tends to be the way their parent company, SAB-MillerCoors works. Miller is abandoning their MGD 64 Lemonade because it failed to appeal to a wide audience. I imagine the same thing will happen here.
Lemon Wheat Ale, Lime Wheat Ale and Valencia Amber Ale all seem too similiar to make sense. Not to mention Blue Moon is usually served with either an orange or lemon slice in it. The flavor is probably made with an overhyped, artifical sweetner.
Peanut Butter Ale just sounds gross. I like peanut butter and honey, and I think they could make for unique ingrediants in a beer, but I don’t believe that Blue Moon will use real ingrediants or use them in a subtle, tasteful way.
I am curious to try the Farmhouse Ale though. Farmhouse is often an interchangable name with saison. However I think the craft brewers who use the name farmhouse will have a funky tartness going on in the beer as opposed to saisons, that aren’t usually sour. Blue Moon is not a craft brewer so this beer will likely not be similar to either style and will likely taste the same as their White Ale, maybe just a bit drier. Why can’t they make something different, rather than just variations of their White Ale?

After spending the day seeing all my beers taste like vinegar, I was scared to try one of my finished beers. I bottled both the IPA and black IPA the day I brewed the brown ale. What if I contaminated those beers while bottling? It’s been 2 weeks since I bottled those beers and I had put one of each in the fridge to try two days ago. I had to try one of them to see if it was ok.
I opened a bottle of the black IPA and poured a glass. It smelled great. And it tasted even better! I was so relieved. It wasn’t very hoppy, a bit more like a porter than a black IPA. Very malty with a sharp bitterness in the finish. If I were to change it, I’d add more hops early in the boil to add more hop bitterness and more hops during fermentation to add some more aroma.
The color is surprisingly very black. When I initially brewed this, it was much more brown and I was concerned that I didn’t add enough carafe malt. After tasting it now, I’m thinking a little less would tone down the sharp bitterness in the finish. And besides, it’s crazy black now!
Oddly enough, right after I last posted on here, I decided to take a gravity reading of beer 6. The good news is that it successfully fermented all the way it was supposed to, giving me an alcohol level of 5.75%. The bad news was that I almost threw up when I drank it. It was terrible. Very sour and acidic, like vinegar. I then took samples of the brown ale and the porter. Same. Thing.
What happened? I got an infection, somehow, that spread to all 3 of the beers I had fermenting. Whatever infection occurs, happens while the beer is fermenting. If any of the equipment I use before I boil the wort had bacteria in it, boiling it for an hour would kill it. The only thing it could be is anything that touches the beer on it’s way to the fermenter or while it is in there. I use a metal cane and soft plastic tubing to siphon beer into the fermenter. I then use the same thing to siphon beer out to take gravity measurements. The likely culprit is the tubing I use for siphoning. Everything I use is either glass, stainless steel, or hard plastic, EXCEPT for the siphon tube which is a soft plastic. Softer materials are more likely to get small scratches that will hold in bacteria. Any sort of tubing is also likely to trap particles from the beer as well. Despite my best efforts to sanitize the tube before and after each use, it is the most likely candidate. I sampled the brown ale and the porter last week and it tasted fine. Well, a strong alcohol taste but fine nonetheless. I brewed beer 6 last friday and today it tastes like vinegar, and the brown ale and porter are a bit sour as well. What probably happened was when I took gravity samples last week, the siphon contaminated the brown ale and the porter. When I used the siphon to transfer beer 6 into the fermenter, it contaminated every drop.
Oddly enough, I was reading through some forums a few days ago and there was some talk about contamination. I read that it is highly unlikely that anyone would get an infection on their first beer since all of their equipment is new. It is more likely to happen around their 6th beer after the materials have had a chance to start wearing out and getting bacteria trapped in them. At the time I thought how lucky I was to have brewed so many beers and not had this issue. Oddly enough, the fact that I brew so often made the infection spread to all 3 fermenting beers rather than just one.
I had to dump all the beer. It’s ruined and there is no recovering it. Altogether I lost 9 gallons. To look at it another way, about 96 bottles of beer down the drain.
I threw the tubing away. As I mentioned before, nothing else could have caused the infection to spread to all 3 beers since it was the only thing that touched all three beers during fermentation.
It has been over a month since I last wrote on here. Despite originally planning on using this as a means to talk about my homebrews, I have failed thus far. So, let’s make up for lost time.
I have brewed 6 different beers in the past month. Through this, I have changed my workflow when brewing and I have decreased the amount of time and effort it takes to brew. After each beer, I decide that I am exhausted and need to take a break for a couple of weeks. That never lasts, I get the itch to brew again a few days later. Below are the beers I have made:
Pale Ale: This was the first beer I made. I wrote this recipe entirely from scratch and intentionally wrote the recipe to be as basic as possible for the sake of keeping it simple. Pale malted barley and centennial hops. Once the beer was brewed and ready to go into the fermenter, I measured the gravity (density of sugar) and it was spot on to my calculations. Awesome! One week later, after all the visual signs of fermentation disappeared, I checked the gravity and found that it didn’t drop as much as it was supposed to. Meaning instead of my beer having 5% alcohol, it was only at 3%. I later learned that the most likely reason this happened was due to my inability to keep a consistent temperature during fermentation. Yeast is very temperature dependent and different yeast strains ferment at different temperatures. When the yeast notice a rise in temperature, they work harder. When the yeast notice a decrease in temperature, they go into hibernation. The yeast I was using was meant to ferment at 70º F. Not the easiest thing to do in Las Vegas during the summer. With this beer, I learned how to maintain that temperature.
I continued the process to finish this beer anyways. Despite it not being perfect, I wanted to see what it would taste like finished. I dry hopped the beer and let it sit for another week and then I bottled it and let it condition and carbonate in the bottle for two weeks.
A few days ago I cracked one of the bottles open to taste it. To my surprise, it was great. Despite the failed fermentation, it tasted like a normal beer. It didn’t have the watery taste that art artificial beers have (Bud/Miller/Coors) and it didn’t seem sweet from the residual sugars. It had a very dry, crisp finish and was very refreshing. The aftertaste was however a bit bland compared to the initial taste. I had intentionally used few ingredients so I could have a blank slate. Sure enough, this gave the aftertaste an expected simple taste to it, but I was suprised that it wasn’t more present.
Black IPA: I initially was planning on brewing regular IPA next, but I was too excited for this beer that I couldn’t wait and decided to brew this one next. Building upon my pale ale recipe, I added two more malts: crystal malt to give it another element of sweetness, and carafa malt to make the beer black in color with a slight roastiness. I still used only one variety of hop, but this time I used cascade hops.
I had brewed only two gallons of the pale ale. This beer, and all the other beers that I made, I brewed three gallons. That means more grains. Not to mention the fact that this was going to have a higher alcohol content than the pale ale so even more grains were used. Long story short, I mashed the grains with too much water and spilled some. While mashing I also had a hard time keeping a consistent temperature. When mashing you typically keep the water between the mid 140ºs to high 150ºs. Any lower and the sugar conversion doesn’t take place. Any higher and you stop the conversion process. Long story short, I measured the gravity before the boil and I was way off. Not wanting to have another weak beer, I made a few changes to the recipe and added some turbinado sugar to bring the sugar content up. After the beer finished the first stage of fermentation I tested the gravity, and it was right at it needed to be, bringing the beer to 6.8% alcohol content!
This beer is still carbonating so I haven’t had a chance to taste the finished product yet. But the taste I took a taste when I was bottling it makes me very excited to drink this! It has a very hoppy aroma but isn’t too bitter. Cascade hops aren’t really known for their bitterness. The addition of the crystal and carafa malts give the beer a nice malty body.
IPA: The original plan was that this beer and the black IPA would be the exact same beer except with the black IPA getting the carafa malts to make it black. My intention was to make very similar beers with only one different ingredient to taste the difference that it makes. This was originally going to be brewed second. It would be the same recipe as the pale ale, but with more hops and an additional malt. The black IPA would then be the exact beer as this, but with the carafa malt. Because I brewed the black IPA before this one, and had the mishaps that I did, I brewed this one a bit differently. I was very cautious and scared that my sugar levels would be low again. Despite not spilling or boiling over the wort, I was still worried. I decided to add less water before the boil than I did before. This would make the sugar level a little bit more concentrated. I finished brewing, took a gravity measurement and was shocked. I wasn’t too low on sugar at all. It was crazy high, and I didn’t even add sugar like I did to the black IPA! The result was that this beer finished with an alcohol content of 8.5%.
This beer is also still carbonating and should be ready to drink about the same time as the black IPA (I brewed them 2 days apart). This beer tastes very different from the black IPA, despite the original plan of them being very similar. They have the same amounts of hops in them, but since this has a higher alcohol level, the residual sugars mask some of the bitterness and leave mostly just hop aroma. The added alcohol also give it a slightly thicker body, making this a very smooth beer with a very balanced hop level and a high alcohol content.
Brown Ale/Porter: I’m grouping these together because they were brewed one day apart and have a combined story. I kinda used recipes for these. I used the ingredients that the recipes called for but I changed the amounts used to match the alcohol and bitterness levels that I was looking for. I also changed the recipe for the brown ale because I wanted to try adding some dried maple syrup. Basically, it’s maple syrup that was boiled down to a solid and broken up into small chunks. This sounded like it would be awesome with the brown ale.
The first 3 beers I used a California strain of yeast. These two beers used two different British yeast strains. Both of the yeast strains wanted to ferment at 65º. I kept the first three beers at 70º, so I figured that this wouldn’t be too hard. Wrong. Keeping these at 65º in the summer was a bad idea. First, I mentioned earlier that if the temperature is higher, then the yeast work faster. This sounds like a good thing except for the fact that when the yeast work faster, they put out some off flavors. Specifically, it makes the beers smell and taste like alcohol. The brown ale fermented to the right level that it should have, 6.4%, however it tastes like it is in the range of 8-10% but without the sweetness/body to balance it. I still thought it tasted good, just not what I was planning for.
The porter on the other hand, suffered due to my attempts to control the temperature. The wild temperature swings caused a stuck fermentation for the porter. Unlike the pale ale, this time I tried to fix it. I added the California yeast I had used before and raised the temperature to 70º. Unfortunately, that didn’t work. The porter stopped at 4.3% rather than 6.3% alcohol. In addition to that, it has the strong alcohol taste that the brown ale has.
Both these beers will be bottled in the next week or two and will be done conditioning about 3 weeks after that. It will be interesting to see how they turn out.
6: I’m not sure what style to call this. I’ve been calling it 6 since it’s the sixth beer I’ve brewed. After the temperature issues I’ve had, I started to be intrigued by the saison style of beer. Saisons were brewed by farmers in Belgium and left to ferment in barns during the summer. The result is a yeast strain that ferments up to 90º! Living in Las Vegas, I was excited to try this yeast. I wrote the recipe from scratch by first writing a recipe for a saison the same way I did with the brown ale and porter, by copying ingredients and adjusting the amounts for a saison recipe. I then re-wrote it substituting the grains in the recipe with the leftover grains I had from the first 5 beers. Since I am very fond of black beers, I threw in the rest of the carafa I used from the black IPA. I chose hops based off of what I had leftover as well. Saisons are not typically hoppy beers but I decided to try making this one moderately hoppy, about the level of a pale ale. I used the hops I had that were not over the top to try and keep them from being overpowering. I went to the local homebrew shop to buy the yeast but they didn’t have the specific yeast I wanted. I instead grabbed a different Belgian yeast that will ferment up to 78º. I typically keep my house between 70º-75º so I decided it should be fine.
Saisons are typically light in color and light in hops. They have a very crisp, dry finish and are a little peppery from the Belgian hops that are typically used. Mine is a hoppy, black saison. I figured this will either be awesome or terrible.
I just brewed this beer last friday so it is still fermenting and I haven’t taken a gravity reading or taste since I put it in the fermenter. That one taste was pretty good though! The taste will change quite a bit as the sugars are converted into alcohol and the hops balance out, but so far it is at a good starting point!
There you have it. Six beers in four weeks. I am going to wait to brew again until I bottle the brown ale and the porter. I haven’t decided what I’ll brew next. I am going to keep away from making traditional British beers for now until the temperature drops outside. I am planning on ordering the specific Belgian yeast I’m looking for online and will brew several beers with it. For sure a traditional saison and an IPA using the yeast. Knowing me, I’ll probably make it a black IPA. Whatever I brew next, I’ll be sure to actually start writing about it and posting the pictures I take!
In response to some questions I’ve received, I am going to outline the different supplies needed to brew beer at home. First some general info:
The standard homebrew batch is 5 gallons. When I say standard, I mean that nearly all homebrewing equipment manufactures, books, recipes etc all assume that you are going to be making a 5 gallon batch. I’m not sure how 5 gallons was decided but that’s now typical. That being said, there are two different methods to brew beer at home. Most beginners begin by using an extract based method. The more advanced way, and the way that professional brewers use, is an all-grain method. Or as I like to call it, the “real-ass” way. I’ll describe the differences in these processes later but the main difference when it comes to gear is that with all-grain, you need to be able to boil the full volume of beer you are making. With extract you only need to boil a few gallons. I am going to be brewing only 2-3 gallons at a time, the “real-ass” way. As I describe necessary equipment, it will become clear why I am choosing to brew less than what is typically “standard.” I will outline the gear needed at each step of the way.
The Mash:
Grains are steeped for around an hour in hot water. About 1-2 quarts of water are used for every pound of grain. For a 5 gallons batch, about 10 pounds of grain is needed. I will be using 5-7 pounds for my batches. When brewing standard batches, it is typical to use a 5 gallon cooler for this step. Coolers are meant to insulate heat so these work perfectly for holding 10 pounds of grain along with 4-5 gallons of water over the course of an hour without losing too much heat. These coolers also have a slotted bottom that allows you to easily drain the wort from the mash.
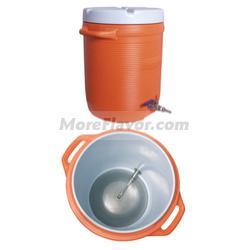
Since I am using smaller batches, I am going to be doing this on the stove in a 5 gallon pot. I purchased nylon grain bags that are meant to hold the grain while they are steeping and allow me to easily remove them from the water. This should allow me to also regulate the temperature by just adding heat from the stove. The tricky bit though when doing this is to be carefull not to burn the grain.
Once the grain has finished steeping, more water is rinsed through the grains until the drained volume equals about a gallon more than the desired brew size, ie 6 gallons or in my case, 3ish gallons. This entire volume needs to be boiled. Extract manufactures will boil this until 80% of the water is evaporated. The result is a thick, syrupy, sticky mess called malt extract.

The Boil:
For all-grain brewers, the entire volume of wort needs to be boiled. If you are making a 5 gallon batch, you will need to be boil 6 gallons of wort (about a gallon gets boiled off after an hour). The pot needs to be big enough to hold this volume without boiling over, so about a 10 gallon pot is needed. It is also important that the wort be brought to a boil as quickly as possible, and as big of a boil as possble. This “hot-break” helps to create a clearer beer. If you are brewing 5 gallons of beer, a kitchen stove top is not powerful enough to bring 6 gallons, in a 10 gallon stainless steel pot, to a boil, let alone quickly. This is the main reason why most homebrewers brew using extract. Those who do brew all grain, buy an outdoor propane burner in order to complete this.

Since I am brewing smaller batches, I will be able to complete this on the stovetop in my 5 gallon pot.
Extract brewers only need to boil 3 gallons of water. The malt extract is added and once the boil is complete, 3 gallons of cold water is added to quickly cool the wort.
Cooling the wort:
The wort needs to be cooled as quickly as possible. About 30 minutes is ideal. The wort needs to be cooled to a temperature that will not kill the yeast. It needs to be done quickly so it can start fermenting and prevent any bacterial infection.
As I mentioned above, extract brewers have this step pretty easy. They can just add cold water and then put the pot in an ice bath for a little bit.
All-grain brewers doing standard batches have a difficult time here. Bringing 5 gallons of boiling wort down to 65 degrees is not an easy task. Tools such as an immersion chiller are used. These copper spirals are inserted into the brewpot. On one end of the tube, cold water is pumped in and exited through the other end. There are various other pieces of equipment that can be used here but these are the most common in homebrewing.
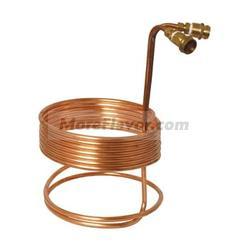
I will be attempting to cool my wort using only an ice bath. I can’t add cold water since I won’t be using extract. Adding water will thin out the wort and weaken it. If the ice bath method doesn’t work, then I’ll likely get an immersion chiller.
Fermentation:
Regardless of what method you are using to brew, this step is all the same. Typically a glass or plastic carboy is used to the hold the wort, along with the yeast, and left to create beer.
As you can see, there isn’t too much gear that needs to be purchased, especially if you are using extract or brewing smaller all-grain batches. There are several other pieces of equipment that are needed as well if you want to make the best beer possible. A 5 gallon pot may not cost much but everything else adds up.
Thermometers:
Temperature is everything. Mashing too high will release foul tasting enzymes so you need to make sure the mash temperature is just right. You also have to make sure it isn’t too cool either otherwise the starch won’t convert into sugar. Temperatures also need to monitored when fermenting to prevent killing the yeast.
Hydrometer:
A hydrometer is used to measure the density of liquid. For the purposes of beer, it is used to calculate the alcohol content. Pure water is 1.000. Depending on how strong you are making the beer, the density, or gravity, will be, let say, 1.050 before fermentation. The added density is from the sugar that was extracted from the grains. After fermentation, the yeast will have consumed the sugar dropping the density to about 1.012. By multiplying the difference in the original and final gravity by 131.25 (don’t ask me what this number means, some scientist figured it out) you will find out that you have a beer that is 4.99% alcohol.
Volume and weight measurement:
If you don’t already own these, you will need to be able to measure quarts and gallons of water as well as pounds of grains and ounces or grams of hops.
Bottling equipment:
Tubes, syphons, bottles, bottle caps, bottle capper etc
Sanitation:
Everything must be sanitized! This is one of the most important part of brewing. You will need sanitizer and a bucket to hold enough of it to sanitize your fermenters, bottling stuff, thermometers/hydrometers etc.
The good news is that ingredients are pretty inexpensive. Barley is about $1.50/lb. I am using about 5-7 pounds per batch. Hops are about $1.50/ounce. I am using 1-2 ounces a batch. Yeast is about $6 a batch.
There you have it! Any questions, feel free to ask!
All the pictures above came from MoreBeer!’s website. Once I brew my first batch, I’ll post some photos from that.
If you are interested, or even just mildly curious, about how to brew beer at home, you need to read this book. This book excels over many other revered texts on home brewing simply for how straight forward and beautifully presented the informations is.
Brewing beer is not easy but it isn’t difficult either. It is an involved process with a lot of independent variables that the brewer is in control of. Because of this, every other book on brewing is typically a lengthy read. Beer Craft, on the other hand, is neither too wordy or too simple. It can easily be read in one sitting. Despite this, Beer Craft is just as informational as other books on home brewing. It is very clear what steps need to be followed exactly, and what steps you have the freedom to explore on your own. In addition to this, there are plenty of charts breaking down different ingredients and how they can be used. Brewing beer is a science. The ratios of the ingredients used and even the different temperatures used can alter the end product. Beer Craft does an excellent job of teaching the science without being too overwhelming.
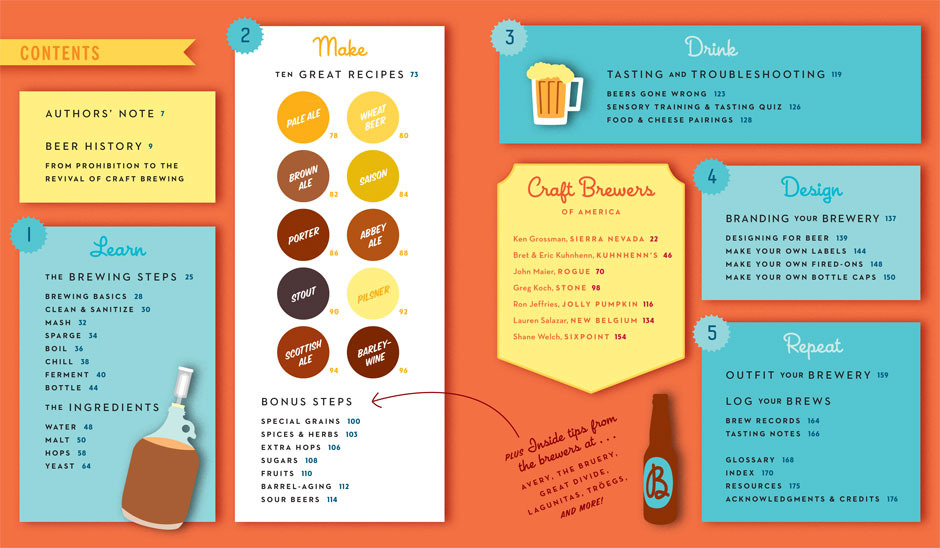
Most books will recommend beginners start by using malt extract to brew beer. Beer Craft doesn’t even suggest this as an option, giving only all grain brewing methods. Where others will caution against the involvement required to brew all grain, Beer Craft provides the reader with one gallon recipes that can be brewed on a standard kitchen stovetop with supplies that do not require a hefty financial expense. This allows beginners to brew beer like the pros do, right from the get go.

Lastly, few books properly instruct beginners how to begin formulating their own recipes. Descriptions of beer styles is usually done by describing the final product, not the ingredients used to create it. Within Beer Craft are various charts showing what malts are used, and to what percent of the total grain bill, for each style of beer. Within each recipe Beer Craft gives, there are suggestions on what to change or add to the recipe. For example, Beer Craft provides a recipe for a pale ale. It then gives substitution suggestions to change it into an IPA, imperial IPA or even a black IPA. In addition to the recipe suggestions, one of the most useful chapters is one on adding specialty ingredients. Not only does it suggest different fruits or spices to add, but how much should be added and at what point in the process it should be added. Taken together, you learn what ingredients make up 10 different styles of beer, and suggestions on what to change in order to create other styles, or what to add to create something entirely new. If you want to brew an IPA with oranges, you can create a recipe simply by using the pale ale recipe, following the guidance on how to make it an IPA, then following the suggestions for adding citrus fruits. No other book I’ve read has shown me how to do this so easily.
I’ve learned more about beer reading this book than I have from reading anything else. This was also the shortest of all the beer books I’ve read and the best looking!
For more information, and more photos of the pages, go to the Beer Craft Book website


