 A friend of mine, Sarah from Sarah n’ Spice, shared an awesome recipe with me on twitter. Being fan of both beer and cheese, the idea of a beer cheese soup sounds awesome. As an added bonus, it uses Tenaya Creek’s Hop Ride in the recipe!
Check out the recipe here.
With IPA Day coming August 2nd, I thought I’d re-share one of Goran’s recipes that uses an IPA as a base. Be sure to follow him and his blog on twitter: @cookingwthgormo
–Luis
Hello,
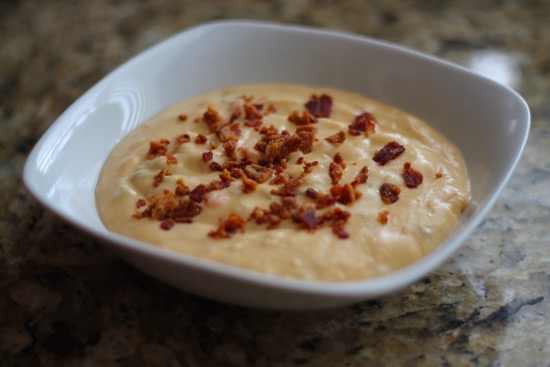
As we continue to embark on a journey with beer recipes, I thought about combining another favorite ingredient that I love to cook with (Bacon). In this post, we will be making a Bacon and IPA Spaghetti sauce. Many of you will wonder what the actual taste will be. I will give you a little hint: it will all depend on what kind of beer you will be using while making the sauce. Think of the beer as the foundation for the sauce. If you start with a not so good flavored beer, do not expect any miracles in the end. You have been warned. The beer I choose today is coming from the Tenaya Creek Brewery. The name of the beer is Monsoon IPA. The beer is light amber in color, full bodied and well hopped. Perfect for this recipe!
On to the cooking now!
Yield: 2 QT
Ingredients:
- 4 ea slices of Bacon
- 4 ea medium Onions, chopped
- 2 ea cloves Garlic, minced
- 1 1/2 lb Beef, ground
- 1 c Parmesan Cheese, grated
- 2 T Worcestershire sauce
- 6 oz Mushroom, sliced from a can
- 12 oz Monsoon IPA Tenaya Creek Brewery
- 6 oz Tomato Paste
- 1 t Salt
- 1/2 t Tabasco Sauce
- 1 1/3 c Tomato Puree
Preparation:
- Fry Bacon until crisp; drain. Remove Bacon from the skillet.
- To the Bacon fat add Onions and Garlic. Sauté until golden. Add ground Beef and Cheese. Stir often. Cook until the meat is brown.
- Add Beer and cook for about 10 minutes.
- Add the Tomato Paste, Salt, Tabasco, Worcestershire, Oregano and simmer for 10 minutes.
- Add Tomato Puree, Mushrooms and Bacon.
- Continue cooking until thickened, about 8-10 minutes.
Note:
Please keep in mind, as I have stated in my previous post, when it comes to the beer recipes, I will try to keep the recipe as straightforward and as simple as possible. You can add additional flavor to the sauce by adding Basil and Parsley to the recipe. I also recommend adding just a pinch of Sugar when making any kind of Tomato sauce. It helps fight the acidity of the tomato.
The finished product should look like this:


It is surprising to me that craft beer drinkers are too often not always craft food eaters. Craft beer drinkers are often proud of the fact that their beers do not contain the adjuncts or chemicals that the large macro brewers use. However many will happily eat low quality, mass produced food.
When Stone brewery first opened their restaurant, they created a menu that contained as much of a focus on quality ingredients, as they have on their beer. The result was their guests often complaining that they didn’t sell cheap bar food. In addition to being the largest purchaser of organic food in San Diego, the brewery even purchased a farm last year so they can even start growing their own vegetables. Stone’s World Bistro and Gardens is a great resource for how to merge craft beer with high quality food.
Here in Vegas, we have several restaurants that do focus on both craft beer and food. Public House and Todd English’s PUB immediately come to mind, along with a few others. However, it isn’t practical for anyone to solely eat at these restaurants everyday, so what can someone do at home to enjoy both craft beer and food?
The first step is to start cooking, using as few prepared meals/ingredients as possible. Buy fresh meats and vegetables and prepare it yourself. I’m not saying you have to buy organic foods, and I’m not saying that you even have to eat “healthy” foods (though both are good options), all I’m saying is that you make your own food from fresh ingredients. Write down a few of your favorite foods, and look up recipes to make it yourself. If you love pizza, buy cheese, sauce, pepperoni, dough, and make it (even better, make your own dough). Do you like hamburgers? Heat up the grill and start making your own burgers. If you want to go to the bar and eat chicken fingers, then you should make your own. I guarantee that if you buy fresh chicken and make your own beer batter, it will taste better than anything you can buy in a bar where the focus is solely on making chicken fingers as quickly, and cheaply, as possible. There are many things added to these foods when you get them at your local bar that you would never use at home. Restaurant food is known for having ridiculously higher sodium levels than the freshly homemade equivalent. The fresher your ingredients, the more flavor the food will have and you will need less salt and fat to make it palatable. Even if it’s a bacon cheeseburger, the home cooked option is more likely to taste better and be better for you (bacon is a nutrient right?).
There are two things you will learn once you start pairing great food with great beer:
1. Great food will make a great beer taste better. The rich, hearty flavors in great dishes will match the quality of the beer and increase its refreshing characteristics.
2. Great beer will make your food taste better. Because the quality of the food matches the beer, the flavors in the beer will match the flavors in your food. The caramel sweetness in a brown ale will match, and increase, the sweetness in barbecue. The light tartness in a hefeweizen will match and highlight the lemon flavors in seafoods, salads, or other dishes seasoned with lemon. Because beer and food have so many similar flavors, you will find a near infinite amount of ways to match food with beer.
I am confident that once you begin to drink your beer with better quality food, you will enjoy both even more.
If you need help with recipes (especially ones using bacon and beer as ingredients) contact Hooked on Hops’ own contributor, Goran Cvijanovic. You can view a few of his recipes here on the site as well.
Earlier I mentioned the struggles Stone had getting their guests to enjoy and appreciate high quality food. You can read more about this, and even get some recipes from the restaurant in their book.
Hello,
Today we will be Tiramisu with a twist. Instead of using Rum and Espresso we will be using Beer Geek Breakfast. You can find the review on the beer in the previous post on HookedOnHops.com
On to Cooking!
Ingredients:
- 3/4 c Cold Heavy Cream
- 2 ea Eggs
- 1 c Confectioner’s Sugar
- 2 1/2 t Pure Vanilla Extract
- 2 ea (8 oz) Tubs Mascarpone Cheese at toom temperature.
- 2 c Mikkeller Beer Geek Breakfast
- 40 ea Ladyfinger Cookies
- 1/2 c Unsweetened Cocoa Powder
Preparation:
- In a chilled bowl, whip the Cream until stiff peaks form, making sure not to overbeat. Cover the bowl when done and set it aside in the refrigerator.
- In another bowl, beat Eggs and Salt until the volume doubles and the color lightens. Add the Sugar, Vanilla and Mascarpone. Mix gently until incorporated.
- Fold in the whipped cream and then set aside in the refrigerator.
- In a shallow dish quickly dunk both sides of the Ladyfingers. Arrange them in a single layer in an 8 inch square dish.
- Spread the layer of Mascarpone mixture over the Ladyfingers. Sprinkle on a liberal amount of cocoa using a fine mesh sieve. Repeat the layers, using all the Ladyfingers and Mascarpone mixture, and generously dusting with Cocoa again.
- Cover and refrigerate for at least 2 hours before serving.
Notes:
Beeramisu will keep covered and refrigerated for up to 2 days.
The final product will look like this:
You remember Goran’s cake recipe he posted using Tenaya Creek’s Imperial Stout, right? Wish you could eat the cake without the hassle of actually making it? Head to the Tenaya Creek brewery after 6pm on the 31st to meet up with Goran and the rest of us at Hooked on Hops to sample some of the cake while drinking some of the brewery’s finest beers.
We plan on having a busy night and there’s only so much cake to go around so show up early!
Tenaya Creek Brewery
3101 North Tenaya Way, Las Vegas, NV 89128
Tuesday, January 31st at 6PM
Hello,
Today we continue with our journey of beer pairing with food. For today’s edition we are making a delicious soup which just screams for attention. Once you have a spoonful, I guarantee you, you will be back for more.
With that in mind, let us begin!
Ingredients:
- 2 T Butter
- 2 T Olive Oil
- 4 ea Large Red Onions, sliced
- 2 ea Garlic cloves, chopped
- 2-3 ea Sage Leaves, torn plus extra for garnish
- 2 ea Thyme Sprigs, leaves from it
- 1 c Draught Guinness
- 4 c Chicken Stock
- 2 t Worcestershire Sauce
- 1 T Brown Sugar
- 6 ea Sourdough Bread, slices
- 1 c Cheddar Cheese, grated
- Salt
- Pepper
Preparation:
- Melt the butter with the oil in a heavy saucepan. Add the Onions, Garlic and Herbs. Season with salt and pepper. Cover and cook over a low heat for 40 minutes until the onions are silky and translucent.
- Stir in the Guinness, Stock, Worcestershire sauce, and Sugar. Bring in to a boil. Reduce the heat and simmer, uncovered, for about 20 minutes until the soup has reduced slightly and developed a rich, deep flavor.
- Meanwhile, toast the bread slices lightly on both sides under a preheated medium broiler. Cut the bread in desired shape. Pile each one with some cheese, then return to the broiler and cook until the cheese has melted.
- Ladle the soup into warmed bowls, float the toasted cheese bread on top, and garnish with a few sage leaves.
The finished product will look like this (depending on how you garnish it!):

Hello,
I have recently became a contributor to this blog. This is the my first post. I will be posting many recipes in the future that include beer as one of the ingredients. Please do not be shy as far as leaving any feedback. I will be also very happy to answer any questions you may have.

For this recipe I have decided to use the Imperial Stout beer from Tenaya Creek Brewery from Las Vegas, Nevada after our recent trip there. The stout has Chocolate, Roasted and Black malts making this a very thick and flavorful beer. It is definitely one of my top favorite beers out there.
Please keep in mind that, for this recipe, I have decided to keep it very simple and also due to the fact that I would like everyone to be able to make this cake, I have taken lots of shortcuts. There is a long way of doing this (which will yield an even better result), but I guarantee you, I would have lost you half way throughout the recipe. Anywho, I implemented the K.I.S.S method (Keep it simple, stupid).
On to the recipe now!
Yield: 12 servings
Ingredients:
- 2 ea (14.5-oz) Gingerbread Cake mix packages
- 2 ea large eggs
- 2 3/4 c Imperial Stout Tenaya Creek beer, room temperature (1 bottle)
- 1/2 c Butter, softened
- 1 ea (16 oz) package Powdered Sugar
- Garnishes
Preparation:
- Stir together gingerbread cake mix, eggs and 2 1/2c Imperial Stout beer.
- Pour the batter evenly into 2 lightly greased cake pans
- Bake at 350 degrees for 35 minutes or until the toothpick is clean once inserted into the center of the cake. Cool the cake on the rack for 1 hour or until completely cool.
- Beat the softened butter at medium speed until creamy. Add the sugar and the 1/4c Imperial Stout beer gradually.Beat until light and fluffy.
- Spread the Buttercream between the layers and on the top of the cake.
- Garnish the cake
Note:
Keep in mind that you can use plenty of things for garnish. I have decided to go for roasted Pecans this time. Make sure you toast them in the over at 350 degrees for about 10-15 minutes. Be careful and do not burn the nuts.
The finished product will look like this:


